After completing the starting dungeon, climb the ladder and you can leave for the overworld: the map of Enalia, where every town, dungeon and wilderness tile lives.
This guide covers traveling the overworld, travel weariness, wilderness danger, hunger, sleeping, and dungeons.
The Overworld
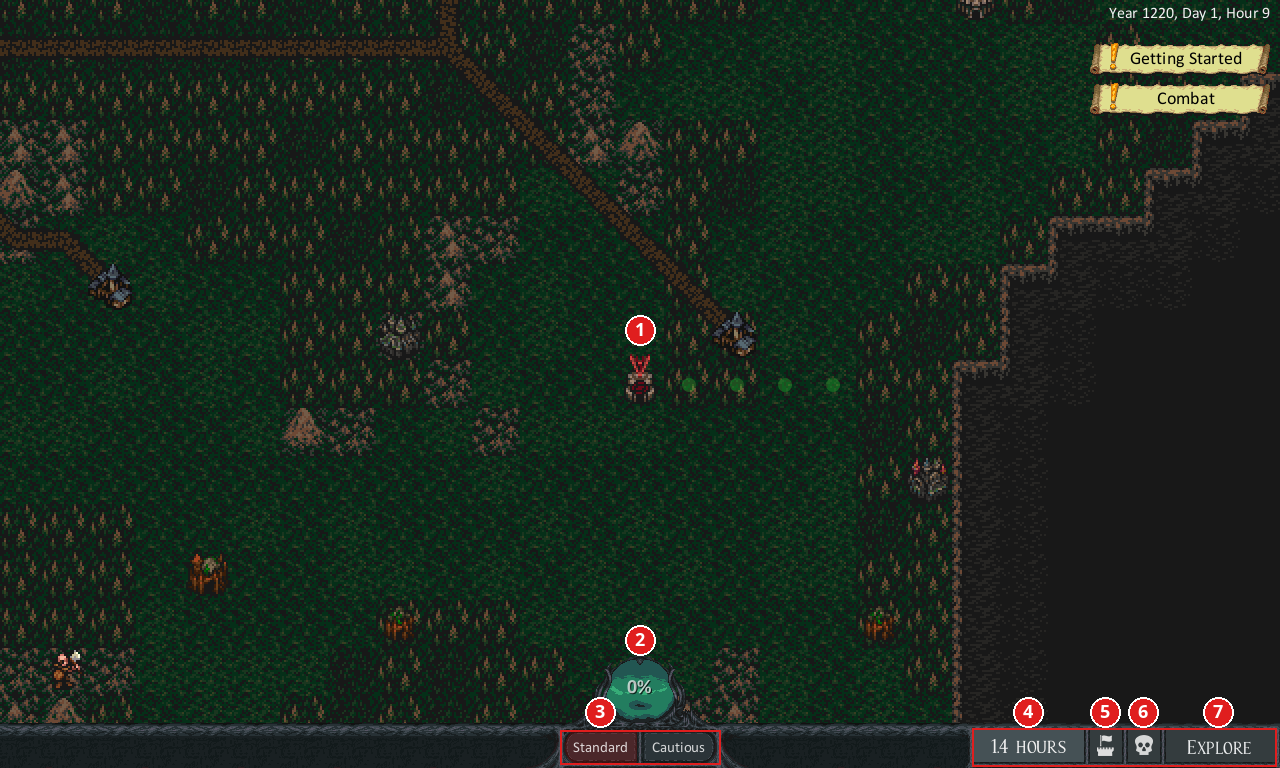
1You
2Travel weariness
3Travel mode: Standard or Cautious
4Hours to reach the next tile
5Faction overlay F
6Wilderness danger overlay G
7Explore this tile E
Click a tile to walk there, one tile at a time. Time passes as you go.
Terrain matters. Plains are quickest, then forest, then mountains. Desert is the slowest. Roads halve the travel time.
Right-click any tile or location to see what it is.
The map starts hidden, and you uncover it as you go. A Map of Enalia, sold at General Stores and scribes, shows the whole world.
Entering a Location
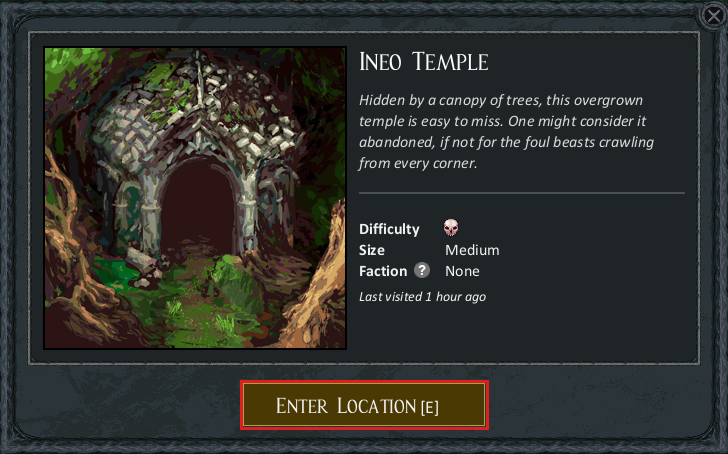
Stop on a town or dungeon and its panel opens. Click Enter Location or press E to go in.
You can also press Explore on an empty tile to enter the wilderness there: forests, plains, mountains and deserts all have maps of their own to walk around in.
To leave any location, press B to escape, or walk off the edge of an outdoor map. Both only work when no enemies are nearby.
Travel Weariness
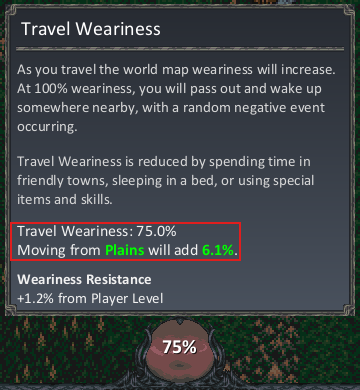
Every step on the overworld adds travel weariness, shown in the orb at the bottom of the screen. It turns from green to red as it fills. Hover it to see how much your next step will add.
Mountains and deserts tire you the most. Roads and higher character levels tire you less.
At 100% you pass out. You wake up somewhere nearby with the Fatigued wound (less energy, attack speed and move speed until you sleep), and something bad happens: lost gold or supplies, or damaged or stolen gear.
To bring it down:
Spend time in a friendly town.
Rest in any bed to clear it completely.
Eat Elderberries (5%) or drink Elderberry Wine (15%, sold at inns).
Wilderness Danger
Each step into the wilderness can trigger an event: wolves, bandits or gremlin raiders ambush you, and you're dropped into a fight on that tile.
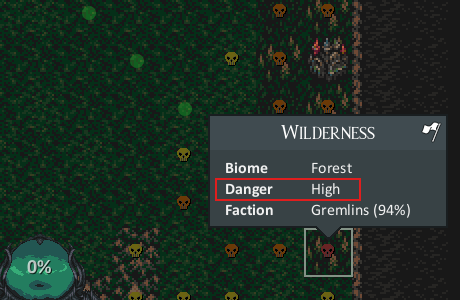
Turn on the danger overlay (G) to see skulls on risky tiles, or right-click a tile. Danger runs from None to Extreme.
Roads are safe. No events happen on them.
Plains are the safest wilderness and deserts the most dangerous. Danger is lower near towns.
Cautious travel cuts the chance of an event by 90%, but you travel 50% slower and tire 50% faster.
If a fight goes badly, you can escape with B or by walking off the map edge once no enemies are within 10 tiles.
Hunger
Walking the overworld doesn't make you hungry. Hunger only grows inside towns, dungeons and wilderness maps, and much faster while you are recovering health or energy. When it sets in, a status icon appears at the top of the screen:
Hungry You stop regaining health naturally.
Starving You slowly take damage until you eat.
Press F to eat. You can eat one food per turn, and have at most two active at once. Food doesn't spoil.
On the overworld, a red skull icon appears whenever you are taking damage, from starving, bleeding or poison. Visit a town, or press Explore to stop and deal with it.
Sleeping & Camps
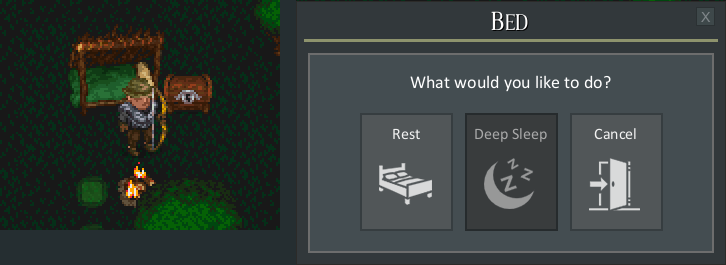
Click any bed to sleep. You can't sleep with enemies nearby.
Rest clears all travel weariness and the Fatigued wound.
Deep Sleep is for leveling up. It is only available when you have skill points to spend (see Skills & Leveling).
Beds are found in inns, houses and many dungeons. A Campsite Kit lets you place your own camp, with a bed, campfire and storage chest, anywhere in the wilderness. The camp stays on the overworld map for good. Buy one at a General Store or Variety Store, or craft one with the Survival skill.
Dungeons
Dungeons are scattered across the map. Right-click one to see its difficulty, from 1 to 5 skulls. Difficulty does not scale with your level, so a 5-skull dungeon is just as deadly at level 1. Pick your fights.
Dungeon Types
Each kind of dungeon has its own icon on the map:
CaveHuge, sprawling caverns.
TempleBuilt by the Machinists, who mysteriously disappeared.
Bandit CastleRuined castles held by bandits.
Marauder FortCamps of the Blackwood Marauders.
Gremlin FortressGremlin outposts, small and large.
Grimjaw's StrongholdHome of the Gremlin king.
Desert CryptTombs in the Sunscorched Wastes.
SanctumHuge 4 and 5 skull dungeons with some of the best loot.
Wizard TowerCurrently only one, in the central mountains.
Inside a Dungeon
Most dungeons have several floors, connected by stairs and ladders. You can't take the stairs with an enemy close by. To leave, press B to escape straight back to the overworld, as long as no enemies are within 24 tiles and you aren't over encumbered.
Floors stay as you left them, and monsters you killed stay dead, so you can come back to finish a dungeon later. To defeat a dungeon, kill its boss or loot its final treasure room. Its name turns grey on the map, and its faction's hold on the land around it fades.
Watch out for:
Traps: you spot hidden traps when you get close. If your path crosses a trap you've found, the path turns red.
Locked doors: they need their key, and some only open from one side.
Darkness: caves and other dark places limit how far you can see. A torch or lantern in your off hand pushes back the dark.
The Road Ahead
The human factions, the Verdant Guard, the Stonewardens and Aridax, hold the towns and cities. They are neutral toward you at the start, and you earn their trust by working for them. The Towns & Factions guide covers them.
The monster factions, like the Gremlins, the Machinists and the Stormbringers of the Tempest Order, hold the dungeons and send raiders into the wilderness. Defeating their bosses, like King Grimjaw in his stronghold, is your long-term goal. It will not be easy.



 Cave
Cave Temple
 Bandit Castle
 Marauder Fort
 Gremlin Fortress
 Grimjaw's Stronghold
 Desert Crypt
 Sanctum
 Wizard Tower